
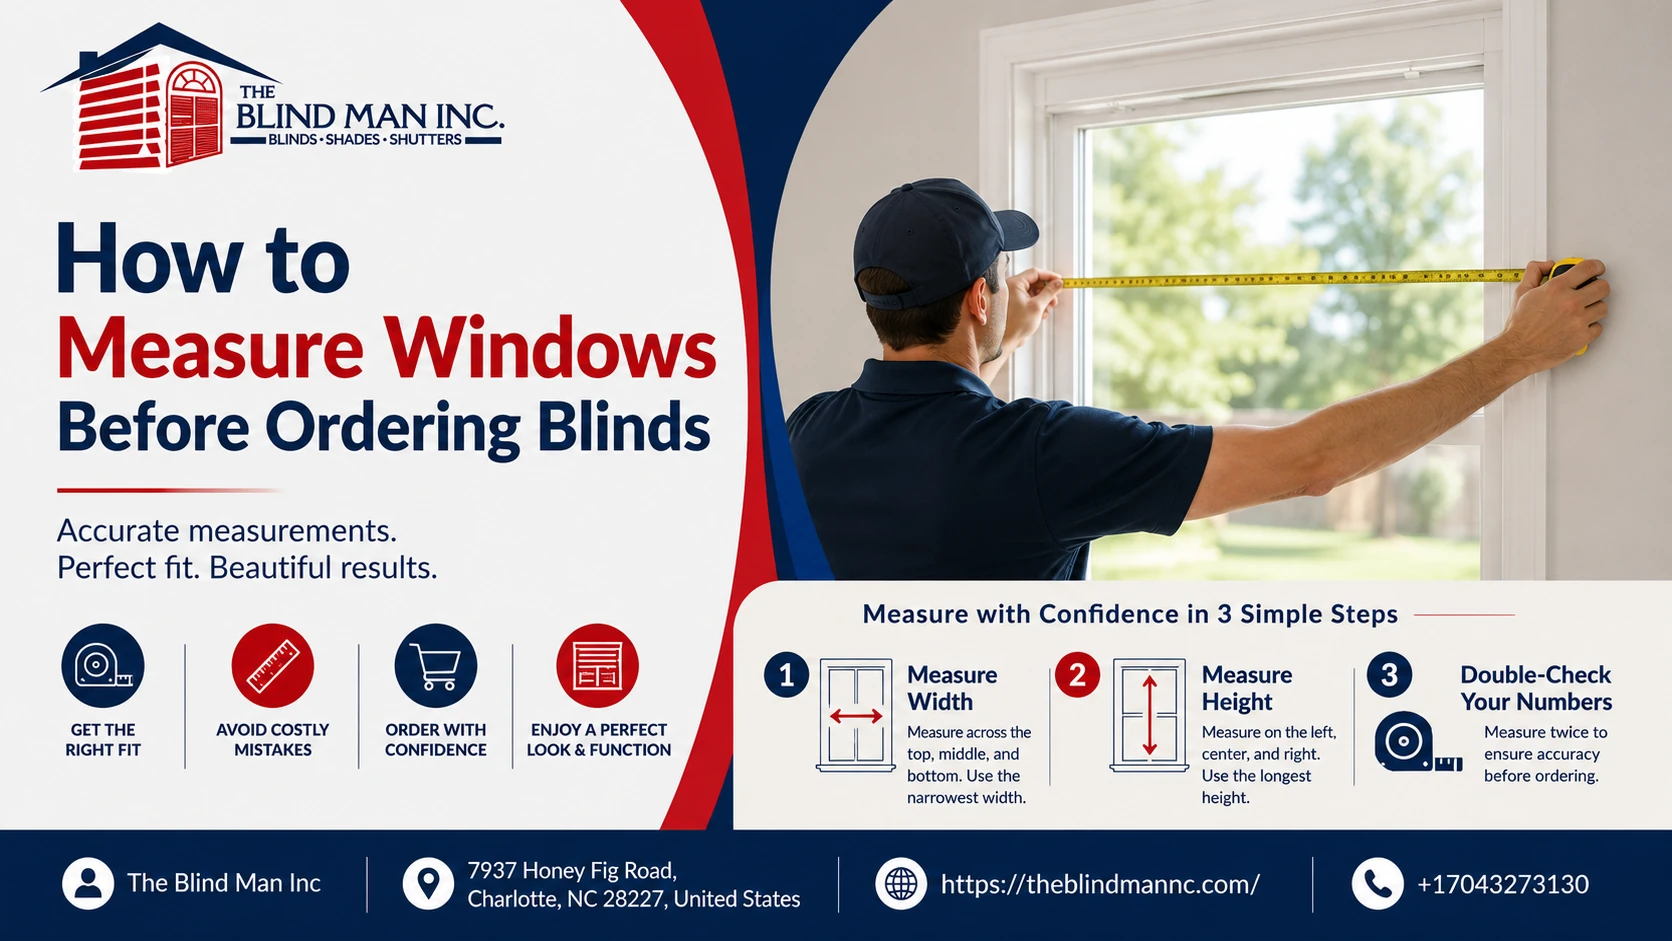
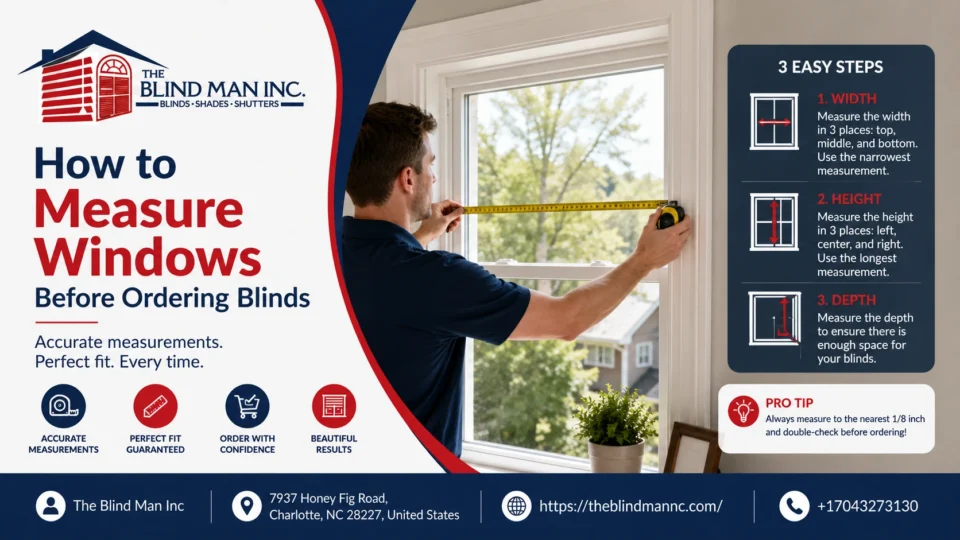
To measure windows for blinds, use a steel tape measure and record the width and height in three places. Inside mount blinds are measured within the window opening, while outside mount blinds are measured to cover an area beyond the opening.
Learning how to measure windows for blinds accurately is essential when ordering custom window treatments. Even a small measuring error can lead to blinds that rub against the frame, leave unwanted light gaps, fail to cover the window, or cannot be installed at all.
The measuring process is not difficult, but it requires patience and attention to detail. Homeowners should measure every window individually, record exact dimensions, and follow the selected manufacturer’s instructions before placing an order. Specialty windows, oversized openings, and motorized blinds may require professional measuring to ensure the best fit.
What Tools Do You Need to Measure Windows for Blinds?
Accurate measurements begin with the right tools. Household items such as fabric measuring tapes, rulers, and pieces of string are not precise enough for custom blinds.
Prepare the following before beginning:
- A steel tape measure
- A pencil
- A notepad or measuring worksheet
- A ladder or stable step stool
- A level, if available
- A calculator, if needed
- The manufacturer’s measuring instructions
A steel tape measure is important because it remains straight and firm across the window opening. Cloth and flexible measuring tapes can stretch, sag, or bend, leading to inaccurate dimensions.
Use Consistent Units
Most custom blind measurements in the United States are recorded in inches, often to the nearest 1/8 inch. Always confirm the measurement format required by the company producing the blinds.
Do not switch between inches, feet, decimals, and fractions. For example, record a measurement as 35 3/8 inches rather than 2.947 feet or approximately 35 inches.
Write the width first and the height second. A window recorded as 36 inches by 48 inches should mean:
Width × Height
Keeping this order consistent reduces the chance of reversing the dimensions when ordering.
Create a Label for Every Window
Do not assume that windows that look identical have the same measurements. Construction differences, settling, trim installation, and past renovations can cause small variations.
Label each opening according to its room and location, such as:
- Living Room Left
- Living Room Center
- Living Room Right
- Primary Bedroom East
- Kitchen Above Sink
- Office Front Window
Write the label beside every set of measurements. This will make it easier to match each blind with the correct window after delivery.
Check the Window Before Measuring
Before choosing a mounting style, inspect the window and surrounding area.
Look for:
- Shallow window depth
- Protruding handles
- Cranks
- Locks
- Alarm sensors
- Uneven trim
- Tile backsplashes
- Window screens
- Air vents
- Furniture near the opening
These features may affect whether an inside mount is possible or whether the blind will operate smoothly.
How Do You Measure for Inside Mount Blinds?
Inside mount blinds are installed within the window opening. This creates a clean, built-in appearance and leaves the surrounding trim visible.
An inside mount is often preferred when the window opening is deep enough to hold the blind’s headrail and mounting hardware. However, the opening must also be reasonably square and free from obstructions.
Step 1: Measure the Window Depth
Measure from the front edge of the window opening to the nearest obstruction, such as a handle, lock, screen, or crank.
Compare this measurement with the minimum mounting depth required by the blind manufacturer. Some products need only a shallow area for installation, while wood, faux wood, and motorized blinds may require more space.
Manufacturers may provide two depth requirements:
- Minimum depth for secure installation
- Fully recessed depth for the blind to sit completely inside the opening
A blind may still be installed if the window meets the minimum depth, but part of the headrail could extend beyond the frame.
Step 2: Measure the Width at the Top
Place the steel tape measure inside the opening at the top. Measure from the inside edge on the left to the inside edge on the right.
Keep the tape straight and level. Record the exact measurement without rounding.
Step 3: Measure the Width in the Middle
Take a second width measurement across the middle of the opening.
Older windows and frames may bow inward or outward, so this measurement may be slightly different from the top width.
Step 4: Measure the Width at the Bottom
Measure across the bottom of the window opening and record the result.
You should now have three width measurements:
- Top width
- Middle width
- Bottom width
For most inside mount blinds, use the smallest width measurement. This helps ensure the blind can fit through the narrowest part of the opening without rubbing against the sides.
Do not make your own width deduction unless the manufacturer specifically instructs you to do so. Custom blind manufacturers often make a small production deduction to allow the blind to operate properly.
Step 5: Measure the Height on the Left
Measure from the inside top of the opening down to the sill on the left side.
Keep the tape vertical and record the exact measurement.
Step 6: Measure the Height in the Center
Repeat the height measurement in the center of the opening.
This is especially important because window sills and upper frames are not always perfectly level.
Step 7: Measure the Height on the Right
Measure from the top of the opening to the sill on the right side.
You should now have three height measurements:
- Left height
- Center height
- Right height
For most inside mount blinds, use the longest height measurement. This gives the blind enough length to reach the sill even if the opening is slightly uneven.
Some products or manufacturers may use different rules, so always verify the ordering instructions.
Step 8: Check Whether the Opening Is Square
Measure diagonally from the upper-left corner to the lower-right corner. Then measure from the upper-right corner to the lower-left corner.
If the two measurements differ significantly, the opening may not be square. A slightly uneven opening may still work for an inside mount, but a substantial difference can cause visible gaps or operational problems.
An outside mount may provide a better result for severely uneven windows.
Step 9: Record the Final Inside Mount Measurements
Record the final dimensions as:
Smallest width × Longest height
For example, suppose the width measurements are:
- Top: 35 1/2 inches
- Middle: 35 3/8 inches
- Bottom: 35 5/8 inches
The ordering width would usually be 35 3/8 inches.
If the height measurements are:
- Left: 48 1/4 inches
- Center: 48 3/8 inches
- Right: 48 1/8 inches
The ordering height would usually be 48 3/8 inches.
Confirm whether the manufacturer expects the exact opening size or the finished blind size before ordering.
How Do You Measure for Outside Mount Blinds?
Outside mount blinds are installed on the wall, trim, or another surface surrounding the window opening. Instead of fitting inside the opening, they cover an area beyond it.
This mounting method can improve privacy and light control because the blind overlaps the edges of the window. It is also useful when the window opening is too shallow, uneven, or obstructed for an inside mount.
Step 1: Decide Where the Blind Will Be Mounted
Determine whether the brackets will attach to:
- The wall above the window
- The flat front of the trim
- The ceiling
- The top of the window casing
- Another solid mounting surface
Make sure the selected surface can support the weight of the blind. Large wood, faux wood, or motorized blinds may require strong anchors or mounting into framing.
Step 2: Choose the Desired Coverage
Measure the width of the window opening or trim, then decide how far the blind should extend beyond each side.
Adding coverage can:
- Reduce side light gaps
- Improve privacy
- Make the window look larger
- Hide uneven or damaged trim
- Provide space for mounting hardware
The recommended overlap depends on the product and the homeowner’s goals. Many outside mount blinds extend several inches beyond the opening, but the manufacturer’s guidance should be followed.
Step 3: Measure the Total Width
Measure from the desired left edge of the blind to the desired right edge.
Unlike an inside mount measurement, this number represents the full coverage area rather than the size of the window opening.
Check for nearby walls, cabinets, artwork, switches, or adjacent windows that may limit the available width.
Step 4: Select the Top Position
Decide where the top of the blind will sit. Mounting the blind higher can make the window appear taller and provide enough room for the raised blind to clear more of the glass.
Make sure there is enough flat mounting space above the window for the brackets and headrail.
Step 5: Measure the Total Height
Measure from the chosen top position to the point where the blind should end.
The blind may end:
- At the windowsill
- Below the trim
- Below the sill
- At the floor for certain door applications
- At another visually balanced point
Check for baseboards, countertops, radiators, furniture, and other obstructions.
Step 6: Consider the Blind’s Stack
When blinds are raised, the slats gather near the top of the window. This is known as the stack.
A taller blind or one with thicker slats may create a larger stack. If preserving the view is important, mounting the blind higher may allow more of the window glass to remain exposed when the blind is raised.
Step 7: Record the Outside Mount Measurements
Record the full desired blind size as:
Total width × Total height
Do not subtract from these dimensions unless the manufacturer specifically requests it. The measurements should reflect the exact coverage area you want the finished blind to occupy.
Inside Mount vs. Outside Mount
An inside mount may be best when homeowners want:
- A streamlined appearance
- Visible decorative trim
- A recessed blind
- A layered treatment with curtains
- Minimal projection into the room
An outside mount may be better when homeowners need:
- Greater privacy
- Reduced light gaps
- Coverage for shallow windows
- A way to hide uneven trim
- A larger visual window appearance
- More room for hardware
- Coverage for an opening that is not square
Neither mounting method is universally better. The right choice depends on the window’s construction and the desired appearance.
What Are the Most Common Measuring Mistakes?
Small mistakes can become expensive when ordering custom blinds because made-to-measure products may not be returnable. Avoiding the following problems can reduce the risk of an incorrect order.
Using a Cloth Measuring Tape
Cloth tapes can stretch or sag across the window opening. This may add or remove enough distance to affect the fit.
Use a steel tape measure for every dimension.
Measuring Only Once
A window may be narrower at the middle than at the top or taller on one side than the other.
Take three width measurements and three height measurements for an inside mount. Then measure the opening again before ordering.
The simple rule is:
Measure twice and order once.
Assuming Identical Windows Are the Same Size
Two windows may look identical but differ by 1/8 inch, 1/4 inch, or more.
Measure and label each window separately. Do not copy dimensions from one opening to another.
Rounding Measurements
Rounding 35 3/8 inches to 35 inches may create a gap. Rounding it to 36 inches may prevent the blind from fitting.
Record the exact measurement to the precision requested by the manufacturer.
Making Unnecessary Deductions
Homeowners sometimes subtract from the width of an inside mount blind because they are worried it will fit too tightly. However, the manufacturer may already make a standard production deduction.
Making an additional deduction can create excessive side gaps and reduce privacy.
Submit the dimensions according to the manufacturer’s instructions rather than adjusting them independently.
Adding to Inside Mount Measurements
Do not add extra width or height to an inside mount measurement. The blind must fit within the narrowest part of the opening.
Additional width may prevent installation or cause the blind to scrape against the frame.
Measuring the Existing Blind
An old blind may have manufacturer deductions, hardware extensions, or an incorrect fit. Measuring it does not necessarily provide the correct dimensions for the window.
Measure the actual opening or intended coverage area instead.
Ignoring Mounting Depth
A window may be wide and tall enough for an inside mount but too shallow for the headrail.
Always check the depth requirements for the specific blind style. Motorized blinds, wide-slat blinds, and decorative headrails may need additional room.
Overlooking Handles and Cranks
Window handles, cranks, locks, and alarm sensors may interfere with the slats or bottom rail.
Measure the distance from the front of the opening to each obstruction. Confirm that the blind can lower and tilt without making contact.
Forgetting About the Tilt Control
Some blinds use a wand, while others use an integrated control. Make sure the selected side has enough clearance for operation.
The control should not conflict with:
- Window handles
- Furniture
- Cabinets
- Adjacent blinds
- Wall corners
Reversing Width and Height
Always record width first and height second. Label each number clearly instead of writing two unlabeled dimensions.
Holding the Tape at an Angle
A diagonal tape can produce a longer measurement than the actual width or height.
Keep the tape level when measuring width and vertical when measuring height.
Ignoring Uneven Trim
Outside mount blinds require a flat, secure mounting surface. Decorative, curved, damaged, or narrow trim may not provide enough space for the brackets.
Measure the available flat area and check the bracket dimensions before ordering.
Using the Same Rules for Every Product
Wood blinds, aluminum blinds, vertical blinds, shades, and shutters may have different measuring requirements.
Even two blinds from different manufacturers may use different deductions or depth standards. Follow the instructions for the exact product being ordered.
Failing to Check Door and Window Movement
The blind should not prevent a window or door from opening.
Check whether the treatment will interfere with:
- Inward-opening windows
- French doors
- Sliding doors
- Casement cranks
- Tilt-in windows
- Security sensors
- Door handles
Measuring From an Unstable Ladder
Stretching sideways from a ladder can create inaccurate measurements and a fall risk.
Reposition the ladder as needed so each measurement can be taken safely and directly.
When Should You Have a Professional Measure Your Windows?
Many standard rectangular windows can be measured successfully by a careful homeowner. Professional measuring is more valuable when the windows, products, or installation conditions are complex.
Specialty-Shaped Windows
Arched, angled, circular, triangular, and other specialty windows require more than basic width and height measurements.
Templates, exact angles, and multiple reference points may be needed. Small errors can significantly affect the finished fit.
Bay and Bow Windows
Bay and bow windows contain several sections positioned at different angles. The treatments must fit without colliding at the corners.
Professional measuring can account for:
- Projection depth
- Bracket placement
- Headrail clearance
- Corner angles
- Handle obstructions
- Overlap between treatments
Oversized Windows
Large blinds are heavier and place more stress on the headrail and mounting surface. The measurements may also determine whether one wide blind or several smaller blinds are more practical.
A professional can help evaluate support requirements and daily operation.
Motorized Blinds
Motorized treatments require planning for more than the window dimensions.
Additional considerations may include:
- Motor clearance
- Battery access
- Electrical wiring
- Outlet placement
- Charging access
- Remote control compatibility
- Smart-home integration
- Shade or blind weight
Professional measuring helps ensure the motor, headrail, brackets, and power supply can be installed properly.
Windows Above Stairs or Tall Ceilings
High windows can be difficult and unsafe to measure without suitable equipment.
A professional installer can use the appropriate ladder and measuring tools while evaluating whether manual, cordless, or motorized operation is most practical.
Older or Uneven Openings
Older Charlotte homes may have windows that are not perfectly square. Trim, plaster, framing, or previous renovations can create irregular openings.
Professional measurement can determine whether an inside mount will work or whether an outside mount would provide a better fit.
Closely Spaced Windows
Groups of windows often need to align visually. Small differences in mounting height can become noticeable when several blinds are installed next to one another.
Professional measuring can help create consistent:
- Headrail heights
- Bottom positions
- Gaps
- Control placement
- Slat alignment
When Ordering Expensive Custom Products
Measuring errors become more costly when the product is custom-made, motorized, oversized, or constructed from premium materials.
Some custom blind providers in the Charlotte area may offer complimentary or low-cost in-home measuring. Using this service can reduce ordering risk and provide an opportunity to identify installation issues before the blinds are manufactured.
Homeowners should confirm whether the company guarantees measurements when it also completes the installation.
How The Blind Man Can Help
The Blind Man can help homeowners determine whether inside mount or outside mount blinds are better suited to each window. Professional measurements account for more than basic width and height. They also consider depth, trim, window hardware, mounting surfaces, operating clearance, and the finished appearance.
An in-home evaluation may include:
- Measuring each opening individually
- Checking whether frames are square
- Evaluating mounting depth
- Identifying handles and cranks
- Reviewing privacy and light-control goals
- Planning consistent alignment
- Measuring specialty or oversized windows
- Evaluating motorization requirements
- Confirming bracket and headrail clearance
Homeowners can explore available Blinds after the measurements and practical needs of each room have been established.
Professional measuring does not replace the homeowner’s design preferences. Instead, it helps ensure that the selected blinds fit properly, operate smoothly, and provide the desired amount of coverage.
Accurate measurements at the beginning can prevent expensive remakes, installation delays, and window treatments that never look or function as intended.
FAQs
Should blinds be measured in inches or feet?
Blinds are generally measured in inches, often to the nearest 1/8 inch. Follow the exact format required by the manufacturer.
Do I measure the window or the existing blind?
Measure the actual window opening for an inside mount or the desired coverage area for an outside mount. Do not rely on the dimensions of an existing blind.
What measurement comes first for blinds?
Record the width first and the height second. The standard format is width × height.
Should I round my blind measurements?
No. Record the exact measurement to the precision required by the manufacturer. Rounding may cause the blind to fit incorrectly.
How many times should I measure a window?
Measure the width and height in three locations for an inside mount. Then repeat the measurements before placing the order.
Why do I use the smallest width for inside mount blinds?
Window openings are not always perfectly square. The smallest width helps ensure the blind can fit through the narrowest part of the opening.
Why is the longest height used for inside mount blinds?
Using the longest height helps ensure the blind reaches the sill across the entire opening, even when the top or bottom is slightly uneven.
Should I subtract from inside mount measurements?
Usually, no. Many manufacturers make their own production deductions. Follow the instructions for the exact blind instead of making an additional adjustment.
How much overlap should outside mount blinds have?
The recommended overlap depends on the blind, window, and desired level of privacy and light control. Measure the complete area you want the blind to cover and follow the manufacturer’s guidance.
Can an inside mount blind be installed in a shallow window?
Possibly. The window must meet the product’s minimum mounting depth. If the depth is limited, part of the headrail may project beyond the opening.
Are outside mount blinds better for privacy?
They can provide better privacy because they extend beyond the window opening and reduce gaps along the sides.
Can outside mount blinds make a window look larger?
Yes. Mounting the blind above and beyond the edges of the opening can create the appearance of a taller or wider window.
How do I measure windows that are not square?
Take measurements in several places and compare the diagonals. An outside mount may provide a better fit when the opening is significantly uneven.
Do motorized blinds require different measurements?
The basic width and height measurements are similar, but additional clearance may be needed for the motor, headrail, brackets, wiring, or battery access.
Should every window be measured separately?
Yes. Even windows that appear identical may have slightly different dimensions.
When is professional measuring worth it?
Professional measuring is especially valuable for bay windows, specialty shapes, oversized openings, uneven frames, high windows, and motorized blinds.
What happens if custom blinds are measured incorrectly?
The blinds may not fit, operate smoothly, provide enough coverage, or align with nearby treatments. Custom products may also be difficult or impossible to return.
Can I use a laser measure for blinds?
A laser measure can help with large dimensions, but a steel tape measure is usually more reliable for confirming the exact edges of a window opening. Verify all readings manually before ordering.
Share this article
Latest articles
September 3, 2026

September 3, 2026

September 3, 2026