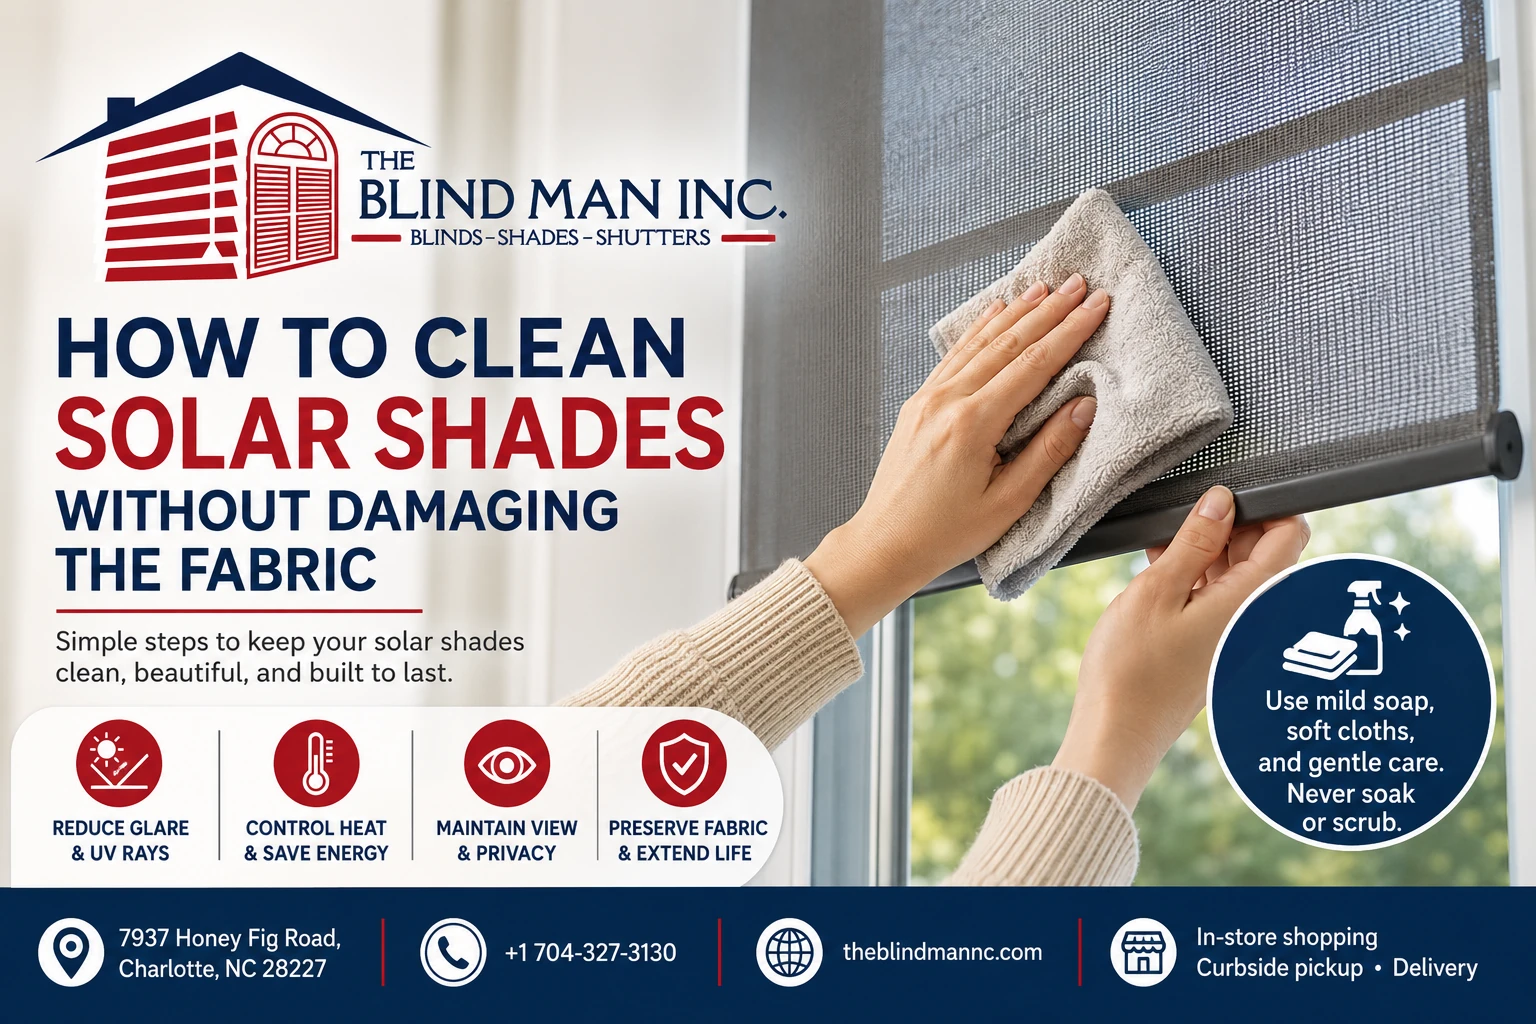
The safest way to clean solar shades is to remove dust gently with a microfiber cloth or a vacuum fitted with a soft brush attachment. For stains, use a small amount of mild soap and lukewarm water, taking care not to soak, scrub, or stretch the woven fabric.
Solar shades require more careful handling than ordinary curtains or solid window blinds. Their specialized fabric is designed to reduce glare, filter ultraviolet rays, control indoor heat, and maintain visibility through the window. Using the wrong cleaning method can distort the weave, leave permanent marks, or affect how consistently the shade filters sunlight.
Learning how to clean solar shades properly can preserve their appearance, functionality, and lifespan while helping homeowners avoid unnecessary repairs or early replacement.
Why Solar Shades Need Special Care
Solar shades are commonly made from tightly woven synthetic materials, such as polyester, vinyl-coated polyester, or blends designed specifically for sun control. The openness of the weave determines how much light passes through the material and how clearly homeowners can see outside.
Unlike washable curtains, solar shade fabric is not intended to be placed in a washing machine or submerged in water. Excessive moisture can weaken coatings, loosen the weave, create water marks, or affect the shape of the material.
Solar shades also collect a different type of buildup than many other window coverings. Because they are positioned directly against windows, they may be exposed to:
- Fine household dust
- Pet hair and dander
- Cooking residue
- Pollen entering through open windows
- Condensation
- Insect debris
- Mold or mildew in humid rooms
Charlotte, NC, and the surrounding region experience long periods of heat and humidity. When moisture collects near windows and remains trapped against the shade fabric, mildew may develop, especially in bathrooms, kitchens, sunrooms, and poorly ventilated spaces.
Routine, gentle maintenance prevents buildup from becoming deeply embedded. It also reduces the need for aggressive cleaning methods that could damage the shade.
What Cleaning Supplies Are Safe to Use?
Most solar shades can be maintained with a few basic household supplies. Before cleaning, check the manufacturer’s care instructions because fabric composition and approved methods can vary.
Generally safe supplies include:
- A clean microfiber cloth
- A feather duster or electrostatic duster
- A handheld vacuum or standard vacuum
- A soft upholstery or brush attachment
- Lukewarm water
- Mild liquid dish soap
- A soft sponge
- White, lint-free cloths
- A dry towel for blotting moisture
Choose a soap that does not contain bleach, strong fragrances, solvents, dyes, or abrasive ingredients. A few drops of mild dish soap mixed with water are often enough for light spot cleaning.
Always test the cleaning solution on a small, inconspicuous section of the shade before applying it to a visible area. Allow the test spot to dry fully so you can check for discoloration, stiffness, fading, or changes to the fabric texture.
Supplies That May Damage Solar Shades
Avoid products and tools that can weaken the material or alter its finish, including:
- Bleach
- Ammonia-based cleaners
- Solvent cleaners
- Strong stain removers
- Abrasive powders
- Rough scrub brushes
- Scouring pads
- Steam cleaners
- Pressure washers
- Hair dryers or heat guns
Even when a product is described as an all-purpose cleaner, it may contain ingredients that react poorly with coated shade fabrics. Gentle cleaning is almost always safer than using stronger chemicals.
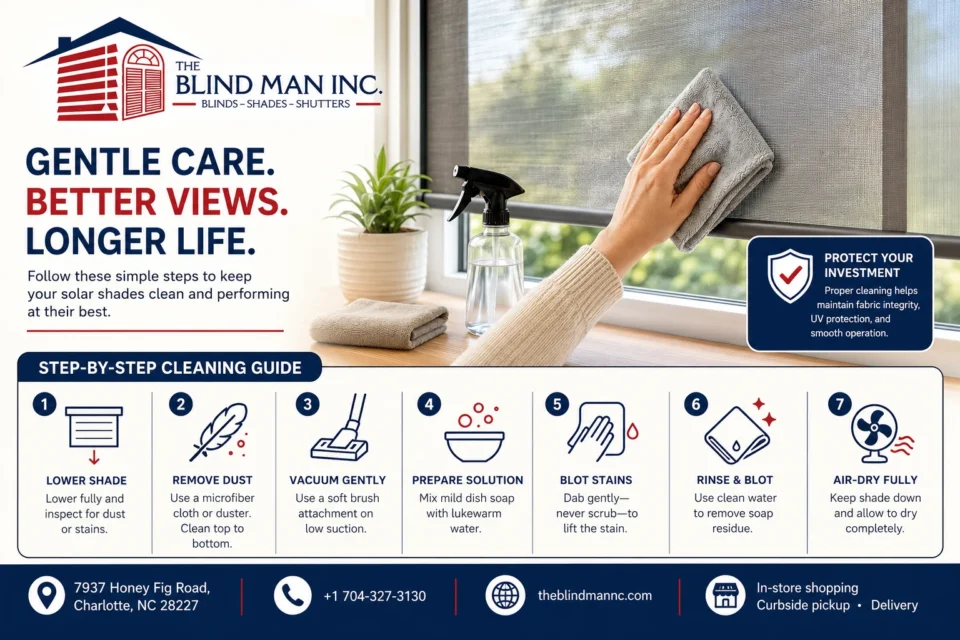
Step-by-Step Guide to Cleaning Solar Shades
The correct cleaning process depends on whether the shades have light surface dust, heavier buildup, or an isolated stain. Begin with the least aggressive method and only add moisture when dry cleaning is not enough.
1. Fully Lower the Shade
Lower the shade until the entire fabric panel is visible. Make sure it hangs flat and is not twisted around the roller.
Inspect the surface in natural light. Look for dust, stains, insect residue, moisture marks, fraying, and areas where the weave appears stretched or distorted.
If the shade is motorized, follow the manufacturer’s guidance before handling the fabric or working near electrical components.
2. Remove Loose Dust
Start at the top and work downward using a clean microfiber cloth, feather duster, or electrostatic duster. Use light strokes rather than pressing firmly into the material.
Working from top to bottom prevents loosened dust from falling onto areas that have already been cleaned. Clean both the room-facing side and the window-facing side whenever they are accessible.
Regular dusting every few weeks can prevent dirt from settling between the woven fibers.
3. Vacuum With a Soft Brush Attachment
For more noticeable buildup, use a vacuum on its lowest suction setting. Attach a clean, soft brush designed for upholstery or delicate surfaces.
Support the shade lightly with one hand while moving the attachment across the surface with the other. Vacuum from top to bottom using slow, overlapping passes.
Do not press the nozzle firmly against the material. Strong suction can pull, stretch, or crease the fabric. Avoid using an uncovered vacuum hose because its hard edges may snag the weave.
4. Prepare a Mild Cleaning Solution
If dry cleaning does not remove a mark, mix a few drops of mild liquid dish soap into a bowl of lukewarm water. The solution should be lightly soapy rather than concentrated.
Dip a white, lint-free cloth or soft sponge into the mixture and wring it out thoroughly. The cloth should be damp, not dripping wet.
Using a white cloth makes it easier to see whether dirt is transferring from the shade. It also prevents dye from a colored cleaning cloth from bleeding onto light-colored fabric.
5. Blot the Stained Area
Gently blot the stain instead of rubbing it. Begin at the outer edge of the mark and move toward the center to prevent it from spreading.
Use minimal pressure and avoid repeated scrubbing. The goal is to lift the residue without disturbing the alignment of the weave.
For dried residue, hold the damp cloth against the spot briefly to soften it. Do not scrape the fabric with a knife, fingernail, or rigid tool.
6. Remove Soap Residue
Dampen a second clean cloth with plain lukewarm water and wring it out well. Blot the cleaned area to remove remaining soap.
Leaving detergent in the fabric can create a visible ring, attract more dust, or cause the material to feel stiff after drying.
Avoid rinsing the entire shade under running water. Unless the manufacturer specifically approves washing, solar shades should not be soaked.
7. Let the Shade Air-Dry
Leave the shade fully lowered until it is completely dry. Keep the fabric flat and avoid rolling it up while moisture remains.
Rolling a damp shade can trap moisture inside the fabric layers and increase the risk of odors, stains, mold, or mildew. Improve airflow by opening interior doors, running a ceiling fan, or using the room’s ventilation system.
Do not speed up drying with a hair dryer, space heater, or direct high heat. Excessive heat may warp the material or damage protective coatings.
Removing Mold or Mildew
Small mildew spots should be handled carefully. Begin by improving ventilation and allowing the shade and window area to dry.
Use a soft vacuum attachment to remove dry surface residue, then test a mild soap-and-water solution in an inconspicuous area. Blot the affected section gently and allow it to dry fully.
Do not use bleach unless the manufacturer specifically states that it is safe for the fabric. Bleach may fade the material, weaken the fibers, and create uneven UV filtration.
When mold covers a large section, produces a persistent odor, or returns after cleaning, professional evaluation may be safer than repeated home cleaning. The window may also have a condensation, ventilation, or moisture problem that needs attention.
Mistakes to Avoid When Cleaning Solar Shades
Many types of shade damage result from cleaning too aggressively rather than from ordinary use. Avoid the following common mistakes.
Scrubbing the Fabric
Hard scrubbing can stretch the weave and create an area that filters light differently from the rest of the shade. It may also leave a shiny patch or visible distortion.
Blot stains with light pressure instead.
Soaking the Shade
Submerging the fabric or spraying it until saturated can cause water marks, coating deterioration, shrinkage, and uneven drying. Moisture may also enter the roller mechanism or motorized components.
Use as little water as possible.
Using Harsh Chemicals
Bleach, ammonia, solvents, and concentrated stain removers can alter the shade’s color and finish. Some chemicals may also damage the protective properties built into the fabric.
Use mild soap only after checking the care label.
Applying Excessive Vacuum Suction
High suction can pull the material away from the roller, stretch the weave, or damage the edges. Always use a soft attachment and the lowest practical setting.
Rolling the Shade While Damp
A damp shade should remain fully extended until it has air-dried. Rolling it too soon can trap moisture and encourage mildew.
Ignoring the Window and Frame
Dust, condensation, and mildew on the glass or frame can transfer back onto a clean shade. Wipe the surrounding window area and allow it to dry before lowering the shade again.
Be careful not to spray glass cleaner directly toward the fabric.
When Should You Consider Professional Cleaning?
Routine dust and small marks can usually be managed at home. Professional assistance may be more appropriate when the shade has extensive buildup, difficult stains, mold, mechanical problems, or uncertain care requirements.
Consider professional help when:
- The fabric has widespread grease or smoke residue
- Mold or mildew covers a large area
- A stain remains after careful spot cleaning
- The shade has water damage
- The weave is stretched, frayed, or torn
- The material has separated from the roller
- The shade no longer raises or lowers evenly
- Motorized components may have been exposed to moisture
- The manufacturer’s cleaning instructions are unavailable
- The fabric is delicate, custom-made, or unusually large
Cleaning may not be the best solution when the fabric has permanent discoloration, severe mildew, extensive UV deterioration, or structural damage. In those situations, replacement may provide a more reliable result than repeated attempts to restore compromised material.
A window treatment professional can help determine whether the shade can be cleaned, repaired, restrung, adjusted, or replaced.
How The Blind Man Can Help
Proper maintenance can keep solar shades looking clean and performing effectively for years. However, homeowners may occasionally encounter stains, fabric damage, worn components, or moisture-related problems that cannot be corrected with routine cleaning.
The Blind Man can inspect existing window treatments and help homeowners understand whether cleaning, adjustment, repair, or replacement is the most practical next step. This is particularly useful when shades no longer roll evenly, have developed permanent marks, or appear to have lost their original shape.
Homeowners considering new window treatments can also review available Shades designed for glare control, privacy, light filtering, and different interior environments. Selecting the appropriate fabric and openness level can make long-term maintenance easier while supporting the desired balance of sunlight, visibility, and UV protection.
The goal is not to replace a shade that simply needs routine care. It is to identify the safest solution when the fabric or operating system has been damaged beyond what gentle cleaning can address.
FAQs
Can solar shades be washed with water?
Solar shades can often be spot cleaned with a small amount of lukewarm water and mild soap, but they generally should not be soaked or submerged. Review the manufacturer’s care instructions before applying moisture.
How often should solar shades be cleaned?
Light dusting every two to four weeks is appropriate for many homes. A more detailed vacuuming can be completed every few months, depending on pets, open windows, indoor air quality, and the room where the shade is installed.
Can I use a Magic Eraser on solar shades?
A Magic Eraser is abrasive and may damage the finish, stretch the weave, or create a visibly lighter area. Use a soft white cloth and mild soap instead.
Can solar shades be steam cleaned?
Steam cleaning is generally not recommended. Heat and moisture may damage coatings, distort the fabric, or affect adhesive and roller components.
How do I remove pet hair from solar shades?
Use a soft vacuum attachment on low suction or wipe the surface gently with a clean microfiber cloth. Avoid sticky rollers with strong adhesive because they may pull at delicate fibers.
What should I do if my solar shade has mold?
For a very small area, allow the shade to dry, vacuum gently, and test mild soap and water on a hidden section. Large, recurring, or deeply embedded mold growth should be evaluated professionally, especially when moisture continues to collect around the window.
Does cleaning affect the UV protection of solar shades?
Gentle dusting, low-suction vacuuming, and approved spot cleaning should not normally affect performance. Harsh chemicals, bleach, abrasive tools, high heat, and soaking may damage the fabric or coating and potentially reduce its effectiveness.
Should I remove solar shades from the window before cleaning?
Routine dusting, vacuuming, and minor spot cleaning can usually be performed while the shade remains installed. Removal may create unnecessary strain on the brackets or roller. For extensive cleaning or repairs, consult a window treatment professional.
How can I prevent solar shades from getting dirty?
Dust them regularly, keep window frames clean, control indoor humidity, address condensation, and avoid leaving windows open during heavy pollen periods. Kitchen shades may also benefit from improved ventilation that reduces airborne grease.
When should solar shades be replaced instead of cleaned?
Replacement may be appropriate when the fabric is torn, badly stretched, permanently stained, heavily affected by mold, detached from the roller, or no longer operating correctly. Significant fading or deterioration may also indicate that the material has reached the end of its useful life.
Share this article
Latest articles

September 16, 2026

September 16, 2026
September 16, 2026